Introduction
You’ve built a brand, listed products on Amazon, but your listings disappear into a sea of competitors with no cohesive brand presence or control. That’s where an Amazon Brand Store comes in.
This process requires a trademark, Professional Seller account, and a few days for approval, but unlocks ad-free brand control and enhanced content tools.
In this article, we will walk through:
- The Brand Registry requirements for setting up an Amazon Brand Store
- Step-by-step Store Builder instructions
What Is an Amazon Brand Store?
An Amazon Brand Store refers to a multi-page, customizable destination on Amazon where registered brand owners showcase their full catalog, tell their brand story, and control the shopping experience without competitor ads. To qualify as a “brand owner” in Amazon’s eyes, you must be the Trademark owner. Only an approved brand owner can create an Amazon Brand Store – resellers cannot – and the brand owner can grant permission to others, but they ultimately own it.
When setting up a Brand Store, Amazon will enable a dedicated URL for your brand (amazon.com/stores/yourbrand) and offer custom layouts, the ability to share video content, create shoppable images, and integrate your store with Sponsored Brands ads on the marketplace.
Quick Distinction: Amazon Brand Store vs. Influencer Storefront
This guide focuses on Brand Stores for sellers, but many first-time storefront creators confuse this process with that of Amazon Influencer Storefronts. Influencer Storefronts are for content creators in the Amazon Influencer Program who curate affiliate product lists. Brand Stores are for trademark owners selling their own products on Amazon marketplace.
| Brand Store | Influencer Storefront |
|---|---|
| Requires trademark + Amazon Brand Registry | Requires social following |
| For sellers | For affiliates |
| Custom brand pages | Curated product lists |
| Drives owned sales | Earns commissions |
Amazon Brand Store Cost
The myth that “anyone can create a storefront” is inaccurate; only Brand Registry-enrolled sellers can create Amazon Brand Stores. Influencer Storefronts have different requirements that we won’t get into in this article.
Once enrolled in Brand Registry, your Brand Store is free to create and maintain. The only associated expense is the $39.99/month Professional Selling Plan fee that you are likely already paying for, plus the Sponsored Brand costs you may end up spending in order to leverage those ads to drive additional traffic to your store.
Amazon Brand Store Requirements: What You Need Before You Start
Building an Amazon Brand Store comes with three non-negotiable requirements:
- An active registered trademark
- An Amazon Professional Seller account
- Approved Brand Registry trademark enrollment
It is also highly encouraged that sellers gather their entire Design Suite before building their Brand Store as this will ensure consistent branding across all pages (colors, fonts, logos, and tone of voice).
How to Create Your Amazon Storefront: Step-by-Step Store Builder Guide
Let’s break down the complete workflow overview of how to get started:
- Access the Store Builder from your selling account
- Select your brand and template
- Design your homepage
- Add category pages
- Populate your Store with products and content
- Preview and submit to Amazon for review
Step 1 – Access Store Builder and Create Your Store
- Navigate to Seller Central → Stores tab → Manage Stores, or the advertising console → Brand Content → Stores
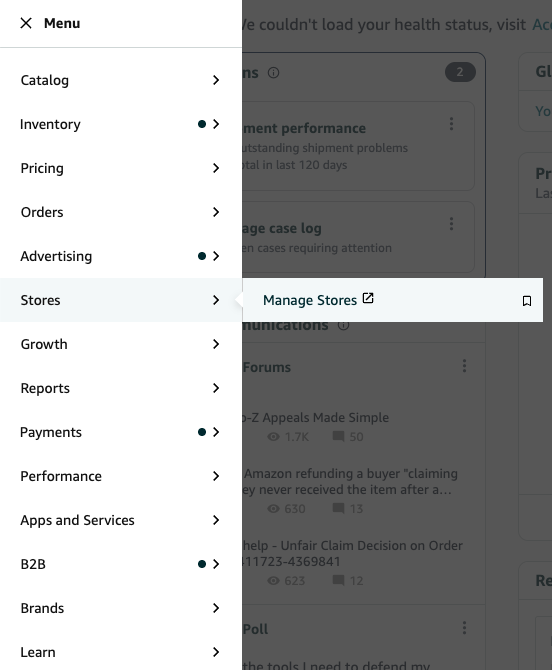
- Click “Create Store” and select your Brand Registry-enrolled brand from the dropdown (if you have multiple brands, you’ll create separate Stores for each)
- Enter your brand display name (this becomes part of your Store URL: amazon.com/stores/yourbrandname)
- Upload your brand logo
Step 2 – Choose Your Amazon Brand Store Template
Amazon currently provides three Brand Store template options:
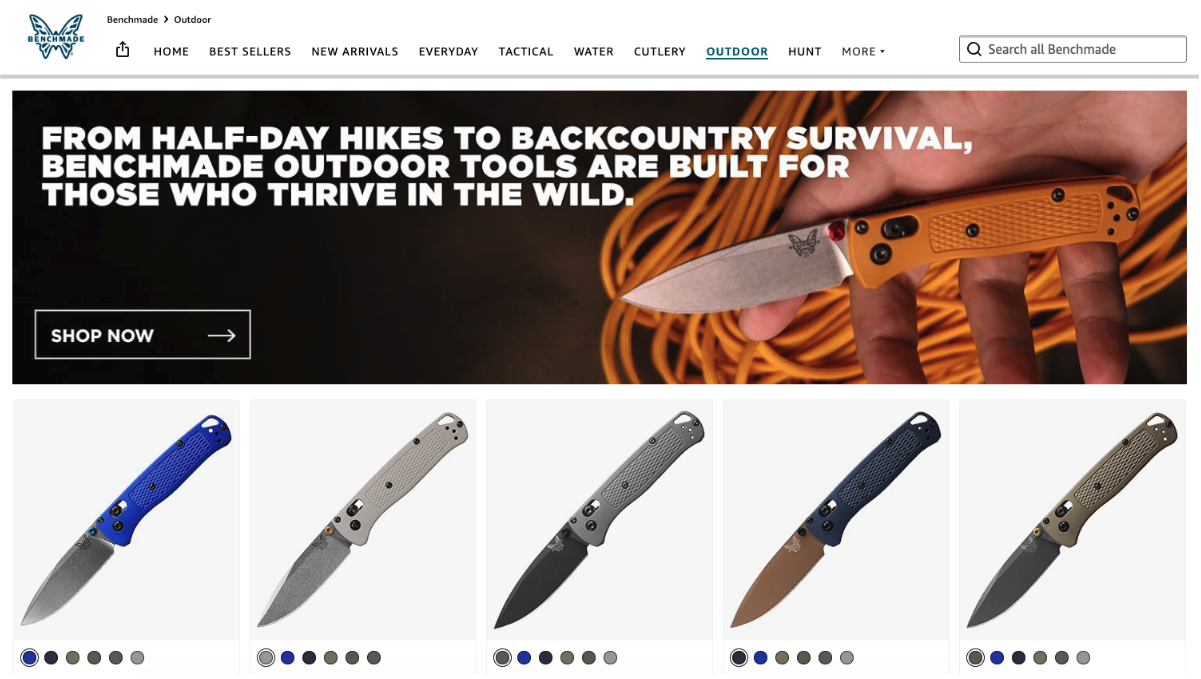
- Product Grid: Straightforward catalog layout, best for brands with < 50 SKUs that want simple navigation
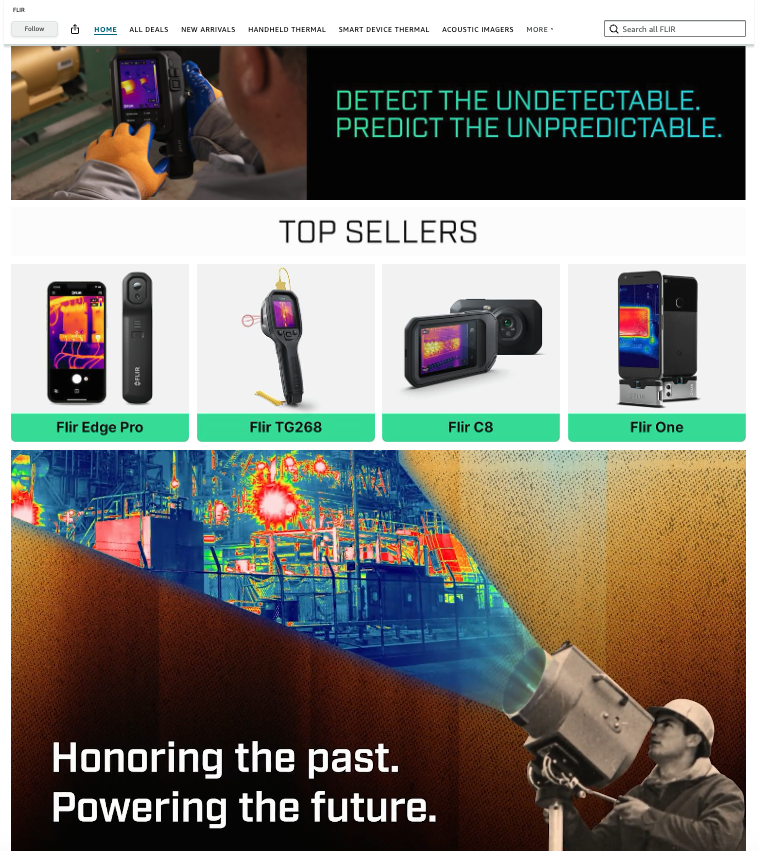
- Marquee: Hero image-focused design with featured product sections, ideal for storytelling and lifestyle brands
- Showcase: Media-rich layout with large visuals and video support, best for premium brands with extensive content assets
Your template choice affects the initial Brand Store layout, but all the elements are customizable.
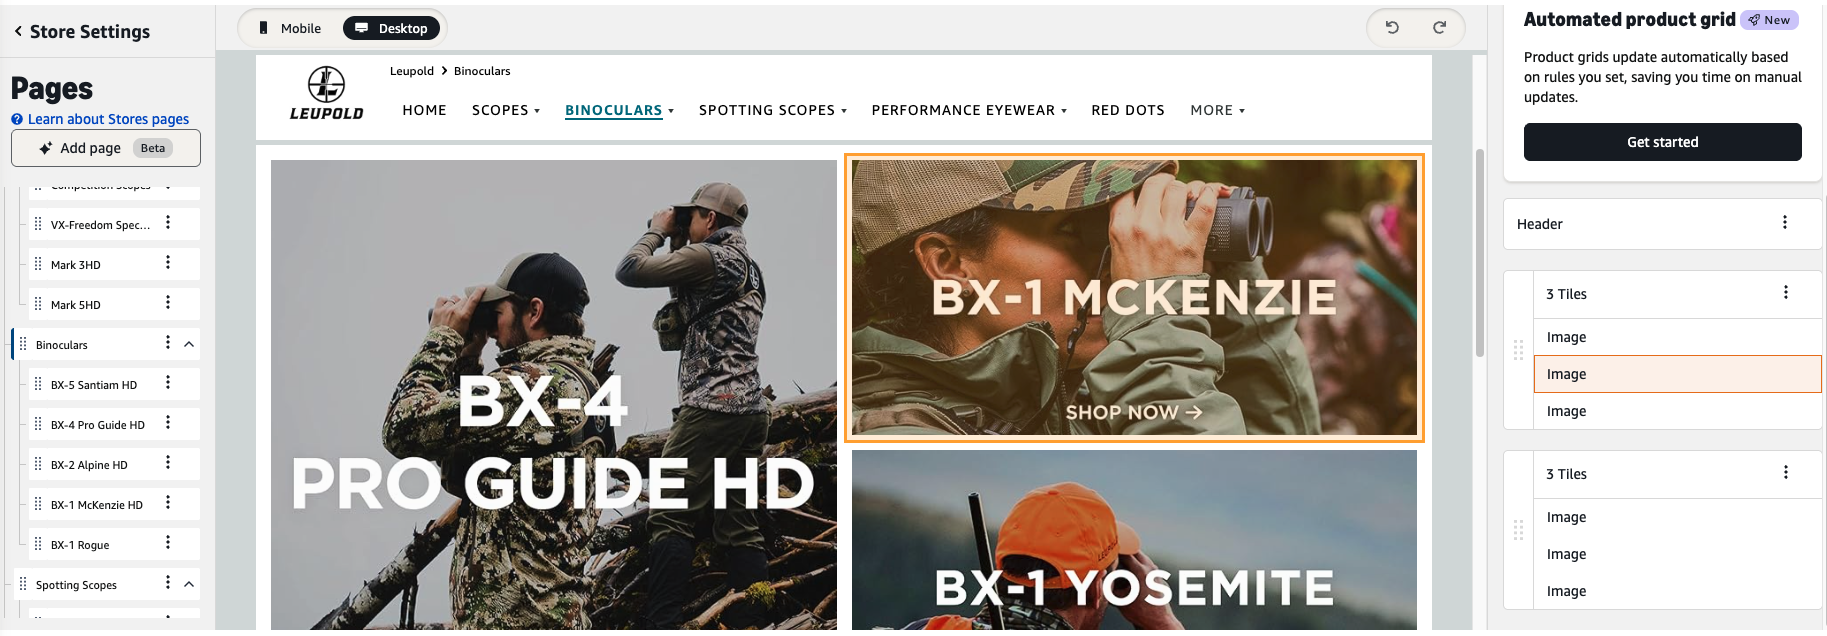
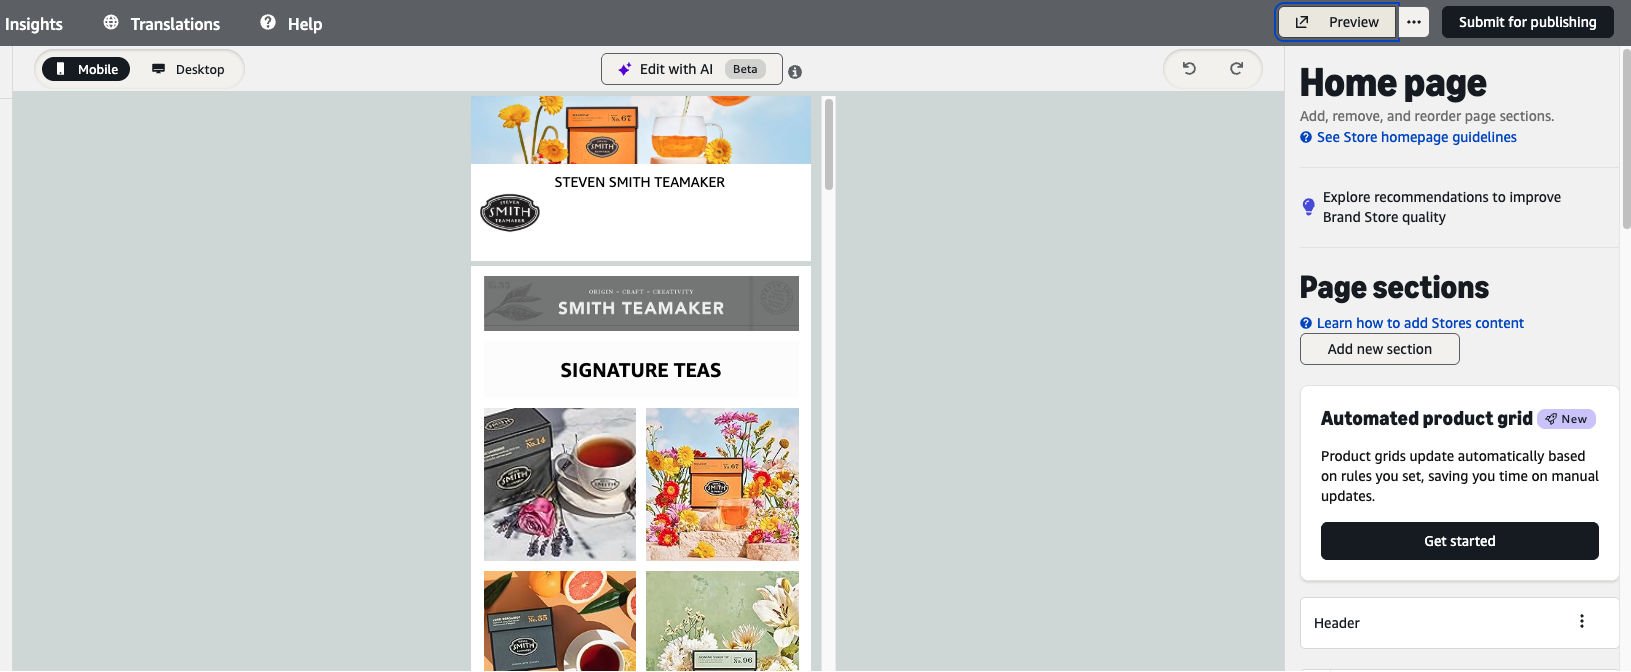
Step 3 – Design Your Homepage with Tiles and Sections
Amazon Brand Stores are designed using a tile system; every element in Store Builder (images, text, product grids, videos) is a “tile” you drag into “sections”. Each page can have multiple sections with many different types of tiles within them (image tiles, text tiles, product tiles, video tiles).
Here is a breakdown of each different type of tile:
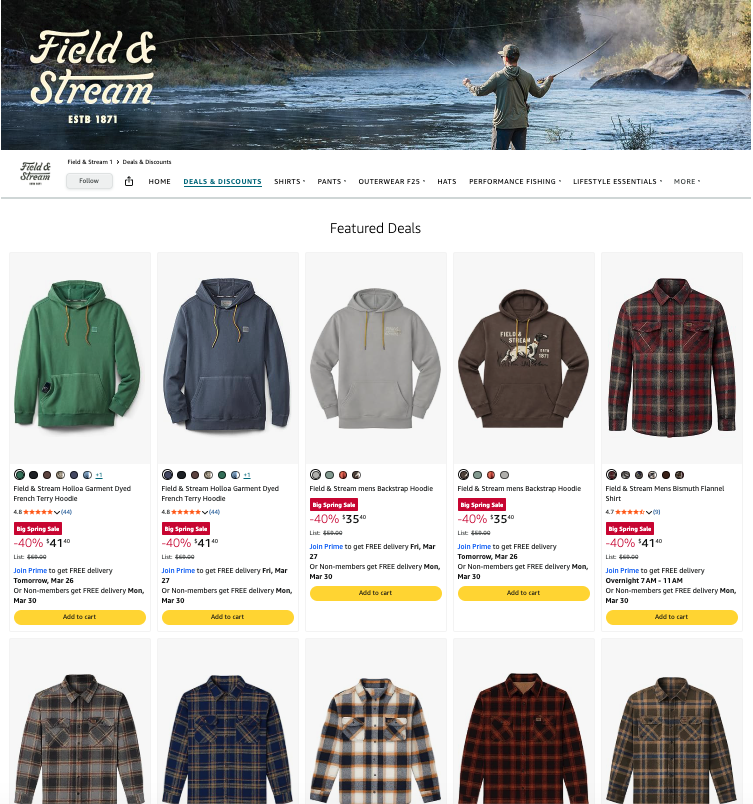
- Image tiles: Link to category pages or featured products; use high-resolution lifestyle images
- Product tiles: Showcase individual ASINs with “Add to Cart” functionality directly on the Store page to capture sales with minimal clicks
- Shoppable image tiles: Overlay product hotspots on lifestyle images (eg: click on a jacket in a styled photo to view that ASIN)
- Video tiles: embed product demos or brand story videos
The Page Manager on the left sidebar shows your page hierarchy and allows you to easily reorder tiles via drag-and-drop. You can also use the Page Manager to nest subcategory pages under parent pages.
No coding is required in the Builder interface, so every seller can easily design multi-page stores without needing any technical expertise.
Step 4 – Creating Category and Subcategory Pages
Multi-page stores often outperform single-page ones as they mirror how shoppers browse (by category, use case, or collection), and improve time-on-site metrics. If you are going to add sub-pages, keep the navigation similar to that of your D2C website for easy organization.
Here are some example page structures depending on your catalog size:
- 10-25 SKUs: Homepage + 2-3 category pages (eg: Men’s, Women’s, Accessories)
- 25-100 SKUs: Homepage + 4-6 category pages with nested subcategories (eg: Apparel → Tops → T-Shirts)
- 100+ SKUs: Homepage + collection pages (eg: New Arrivals, Best Sellers) + category pages with deep subcategory nesting
Each page can be customized to have its own template, hero image, and tile arrangement for full Brand Store control. To add a new page, click “Add Page” in Page Manager, name the page, and choose whether it’s a top-level page or nested under another page.
Design Tip: Overly long content causes people to leave the page, resulting in higher bounce rates. Category pages should provide short, scannable information to entice clicks to the actual product detail page. Utilize whitespace to keep the content digestible for shoppes and avoid cramming too much information onto one page.
Step 5 – Populate Your Store with Products and Content
When selecting products for your Brand Store, use the “Add Products” function to search your catalog by ASIN, SKU, or keyword. Then, drag the product into your desired grid tiles.
- Text: You can add brief category descriptions to provide context but keep text minimal as your Brand Store should be designed with a visual-first perspective.
- Videos: Videos can be added for engagement but keep them short and snappy. It’s best practice to include captions as many mobile users watch without sound. Overall, focus the content on showing products in use rather than static shots.
We always recommend featuring best sellers and high-margin items prominently on your Brand Store. For example, you can use “Featured Deals” tiles to showcase Lightning Deals or products with active discounts.
Step 6 – Preview Mobile and Desktop Views
Today, over 60% of Amazon traffic comes from mobile devices, so it’s extremely important to design your product listings and Brand Store for mobile users.
Make sure to preview any updates on mobile before submitting: Use the Preview toggle at the top of the Store Builder to switch between desktop and mobile views.
Some common mobile issues include too small text that’s difficult to read, images that don’t scale down properly, and CTA buttons that are too small/hard to tap. When previewing your store on both desktop and mobile, double check that all of these look right and are working as intended.
You should also verify that all links are working properly. Literally click through every product tile, category subpage, and any image links to ensure they direct shoppers to the correct destinations.
Step 7 – Submit for Moderation and Publishing
Amazon has a Brand Store moderation process where every edit must pass through a content review before being published live. During this process, Amazon checks for:
- Compliance with the marketplace’s content policy: no prohibited claims, no competitor mentions, no external links, etc.
- Image quality
- Adherence to category guidelines
To submit your store, or any edits, for review:
- Click “Submit for Publishing” in the Store Builder
- Confirm you’ve reviewed the preview
- Wait for email confirmation
You can and should also schedule your Brand Store to go live on a future date. For example, if you wanted a seasonal banner or set of products specifically shown during a given time, then you can create an additional version of the store and schedule it to go live on your preferred date.
Timeline expectations: Initial Store approval typically takes a few business days; subsequent edits are usually approved within a couple of days.
If Amazon rejects your Store, you should receive an email with specific reasons (eg: “Image contains promotional text”). From there, fix the flagged issue(s) and resubmit for review.
3 Common Amazon Brand Store Mistakes & How to Avoid Them
These are a few key lessons learned from our experience managing Brand Stores from our client portfolio.
Mistake 1 – Overloading Pages with Every Product
Problem: Cramming 50+ products onto a single page overwhelms shoppers and dilutes focus away from your best-sellers.
Fix: Curate a few hero products per page and use subcategory pages or “Shop All” links for deeper catalog access.
Mistake 2 – Ignoring Mobile Experience
Problem: Designing a Brand Store on desktop without previewing it on mobile can result in unreadable text, awkwardly cropped images, or poor navigation.
Fix: Always preview your Brand Store on mobile before submitting changes to Amazon. If any design element doesn’t look right on mobile, update it!
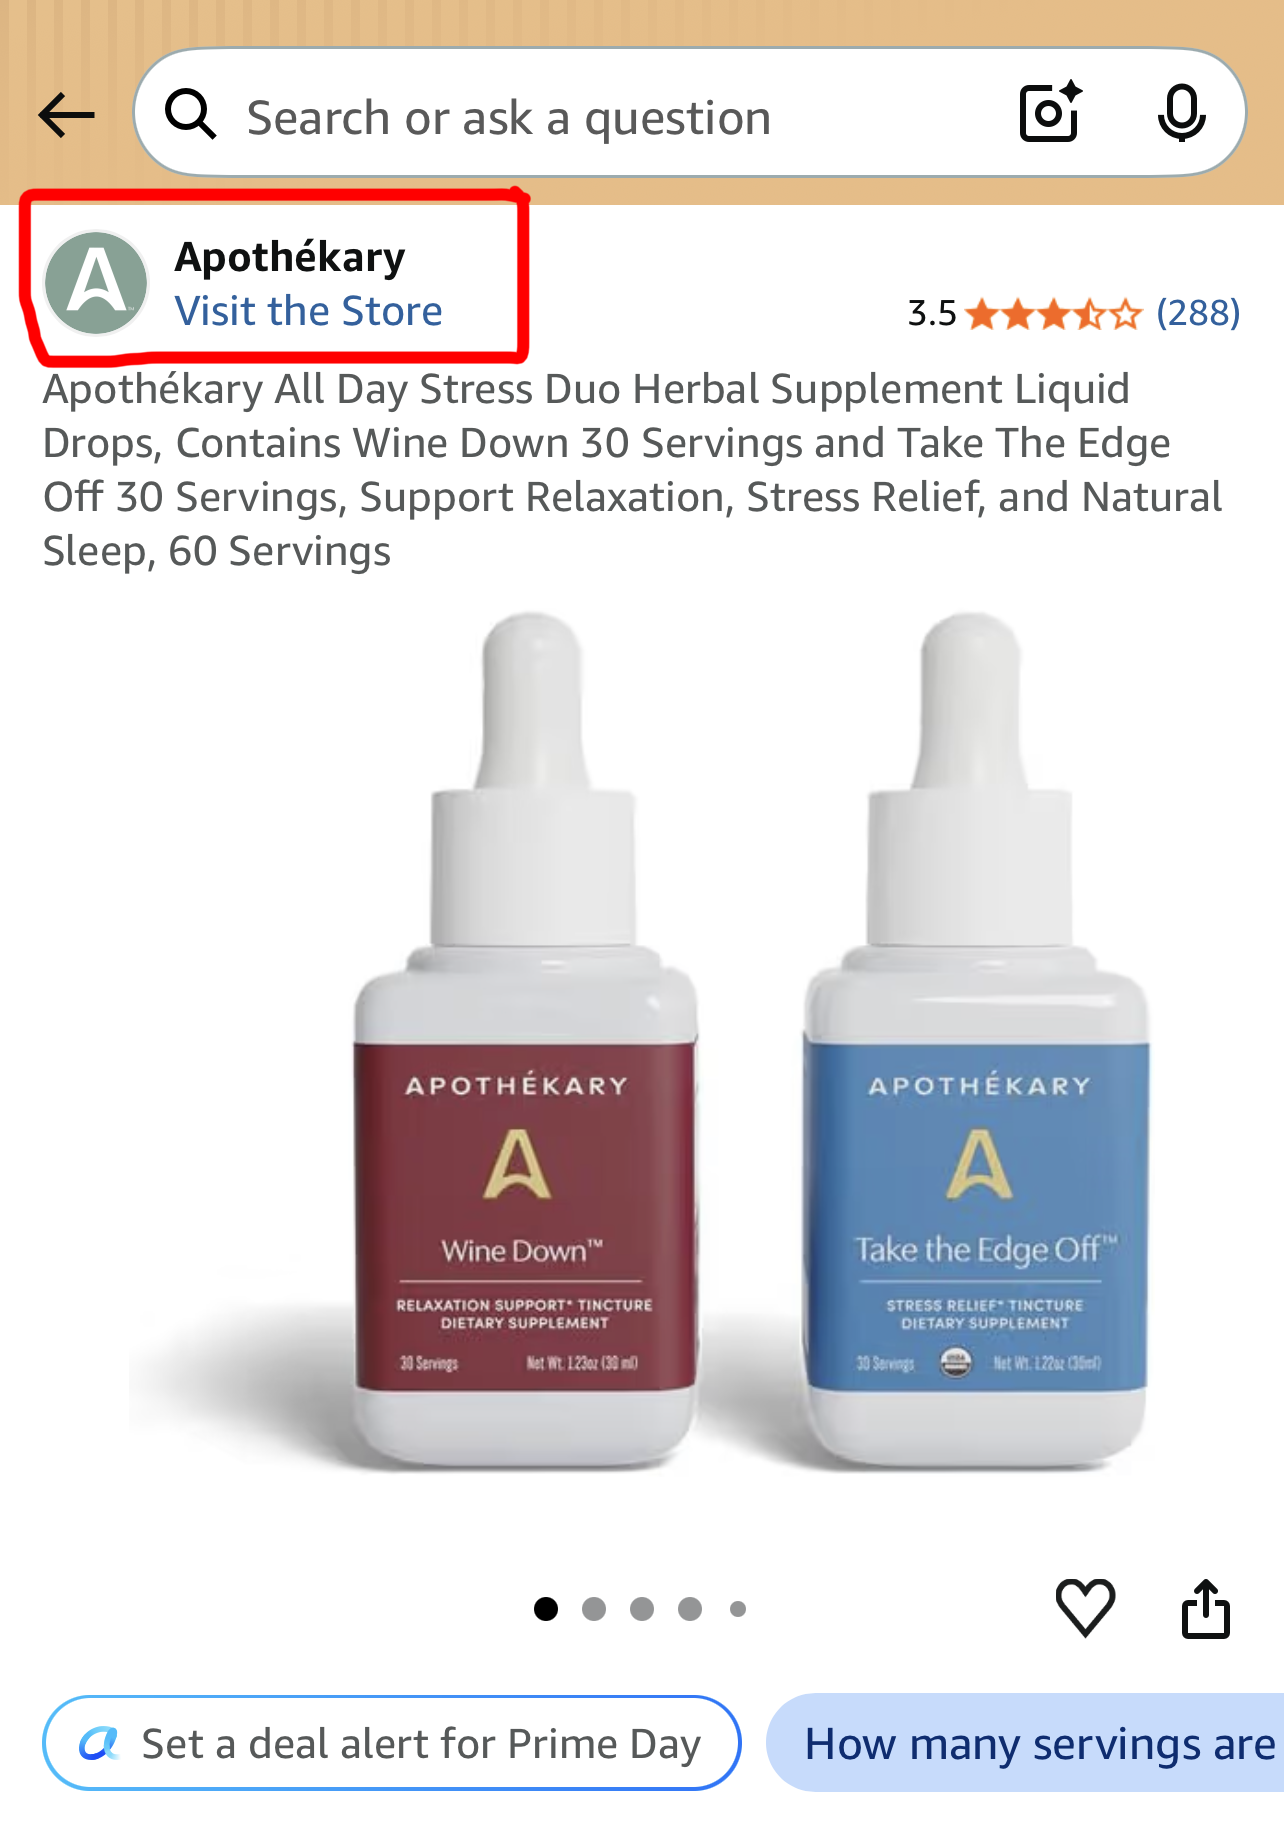
Mistake 3 – Skipping the Setup of Your Amazon Brand Profile
Problem: Your logo is invisible on your PDP for shoppers who are browsing on mobile; they see only a plain text brand name. This undermines your premium positioning, erodes trust at the moment of purchase, and misses a key opportunity to drive traffic to your brand store.
Fix: In the Amazon Ad Console, navigate to your Brand Profile and upload your brand logo (transparent PNG recommended) and your brand hex code to instantly elevate how your brand appears across every mobile listing.
Conclusion & Summary of Key Learnings
- There are three critical requirements you need to meet in order to create an Amazon Brand Store: an active trademark, a Professional Seller account, and enrollment in Brand Registry.
- To build and maintain your Brand Store: Access the feature through Amazon’s backend, choose a template, design your homepage with tiles and sections, create category pages, preview on mobile, run tests, and review quarterly.
- The strategic value of investing in a Brand Store: A completely brand-controlled destination that improves conversion, integrates with advertising, and protects your brand equity on Amazon’s platform.
Partner With Our Amazon Experts
Brandwoven can handle everything from Brand Registry trademark enrollment, Brand Store strategy, set-up, seasonal assets, and anything else you might need.
Our team has facilitated over $1B+ in Amazon sales across 12,000+ ASINs since our founding. Schedule a call with our team to learn more about our experience, what solutions we offer, and how quickly we can start and make changes to your storefront.